

Book your tickets to the National Presidential Wax Museum - Enter your Dates Below!
The Process
RESEARCH
A realistic wax sculpture begins with research, and lots of it! Hundreds of reference photos are collected of the person to be portrayed in wax, with special consideration given to photos that capture the facial expression the artist wishes to immortalize in the face of the final product. These pictures are enlarged and the facial features meticulously measured for reference in the sculpting process.
CREATING THE BODY
Only the head and hands of a wax figure are made out wax, so a custom fiberglass body must be created for the figure by a team of specialized casting artists. A live model is carefully selected whose body features accurately reflect those of the artist’s subject. The model assumes the pose and a rubbery, seaweed-based paste called alginate is applied to the model’s body, capturing even the tiniest details of the body and skin. Plaster-impregnated bandages are then applied to the body over the alginate and left to harden, creating a plaster cast for what will become the body of the sculpture. The model is removed from the cast and layers of fiberglass resin are laid into the inside of the resulting mold. Once the resin dries, the cast is removed, revealing what is to be the fiberglass body of the wax figure. At this time a similar procedure is used to create molds for the wax hands.
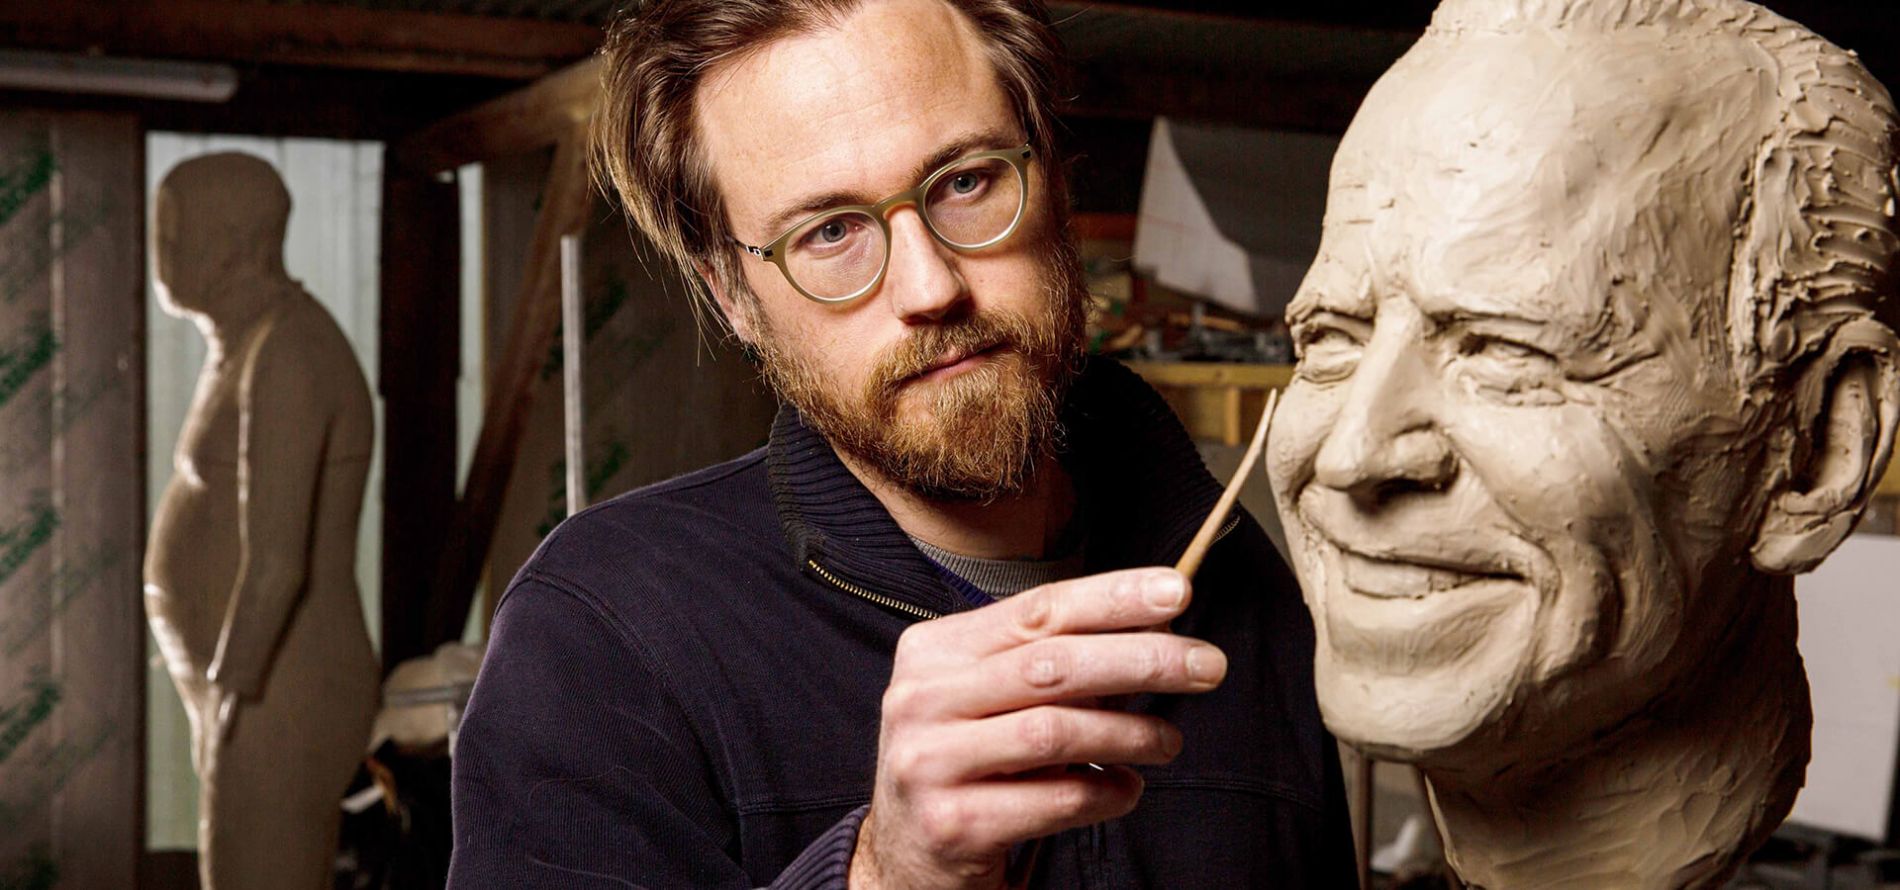
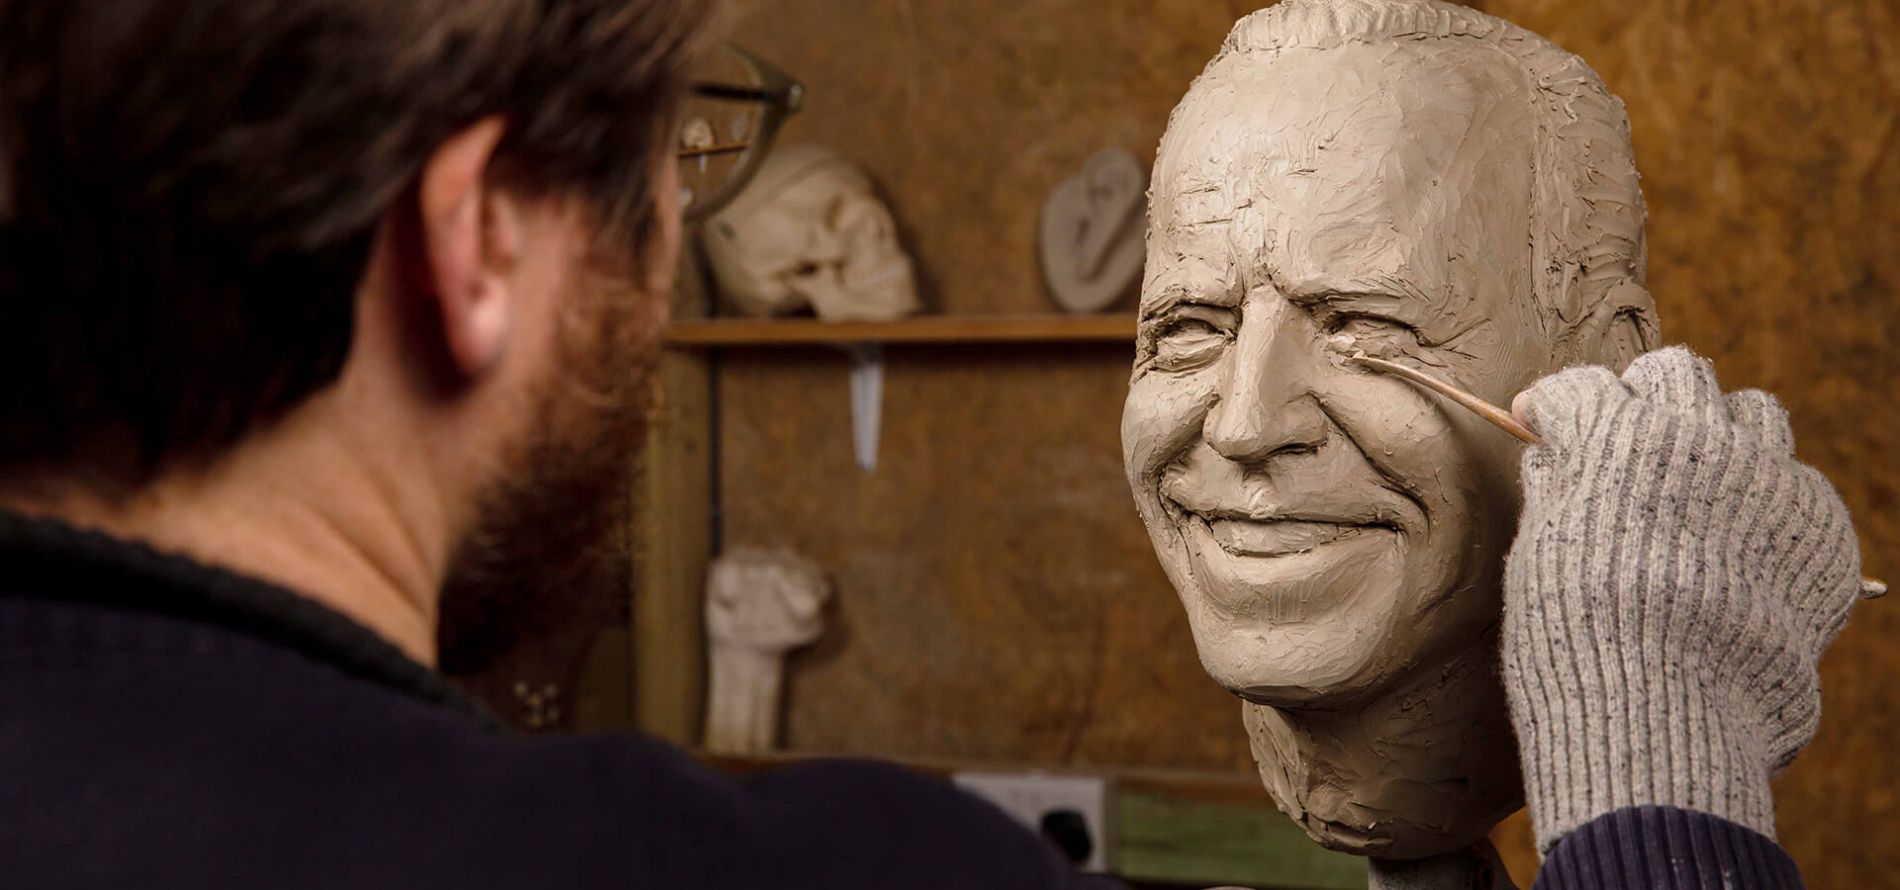
SCULPTING THE HEAD IN CLAY
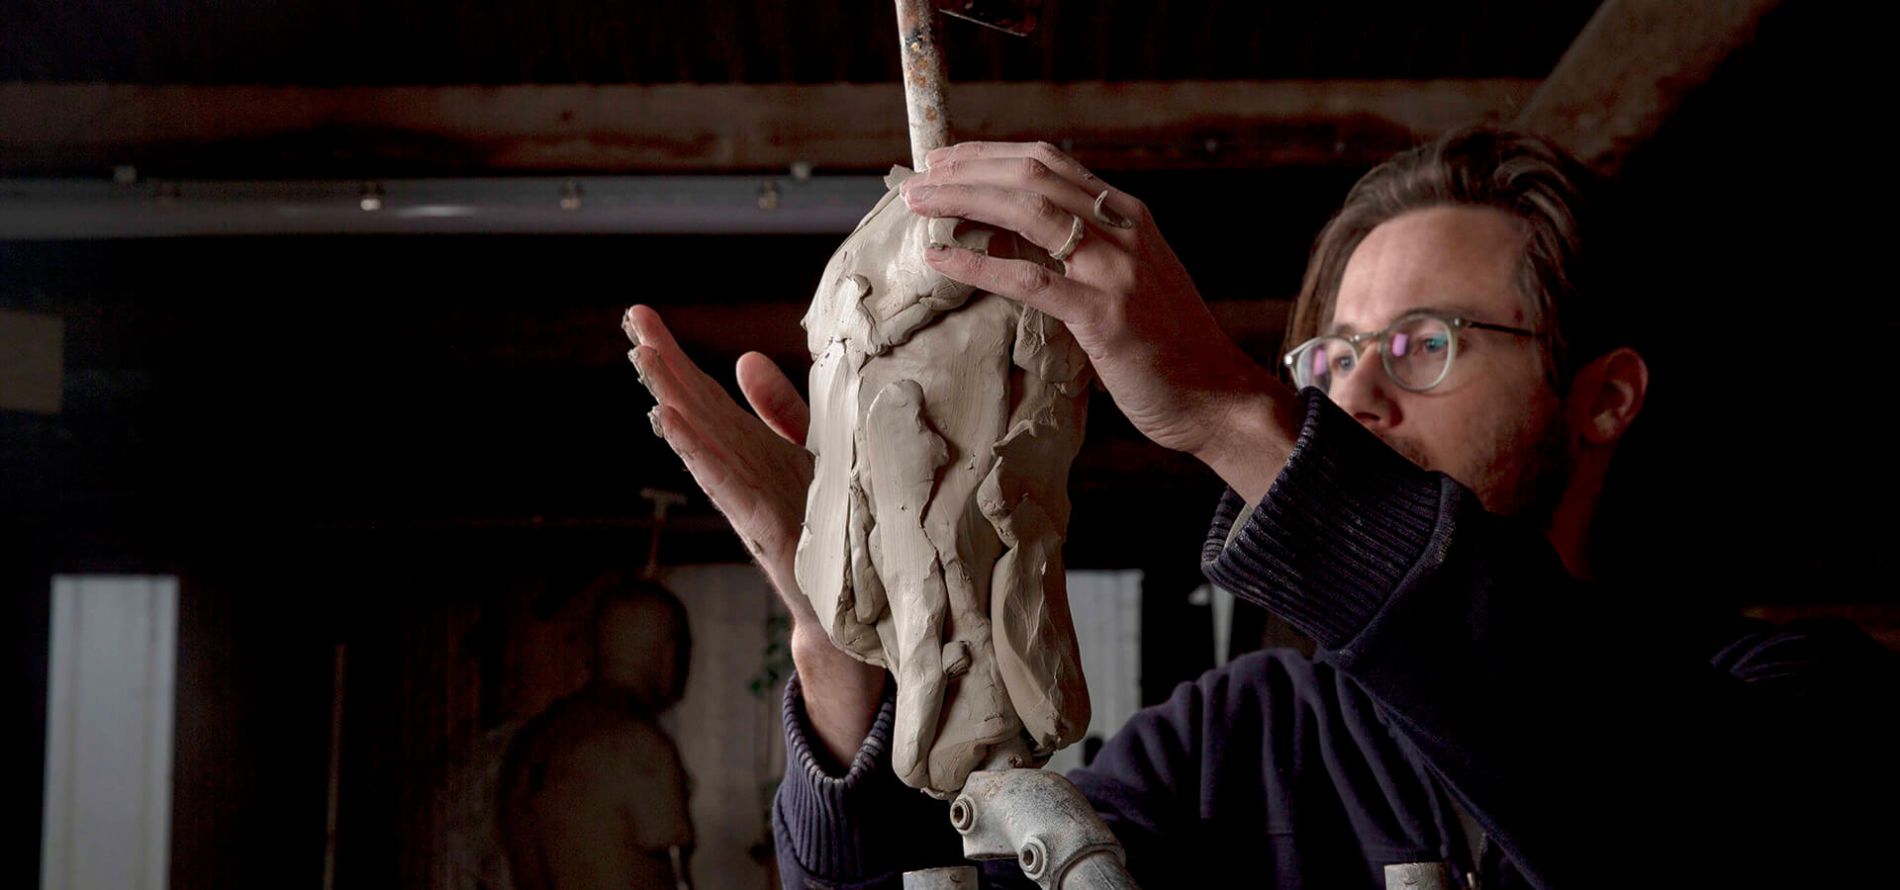
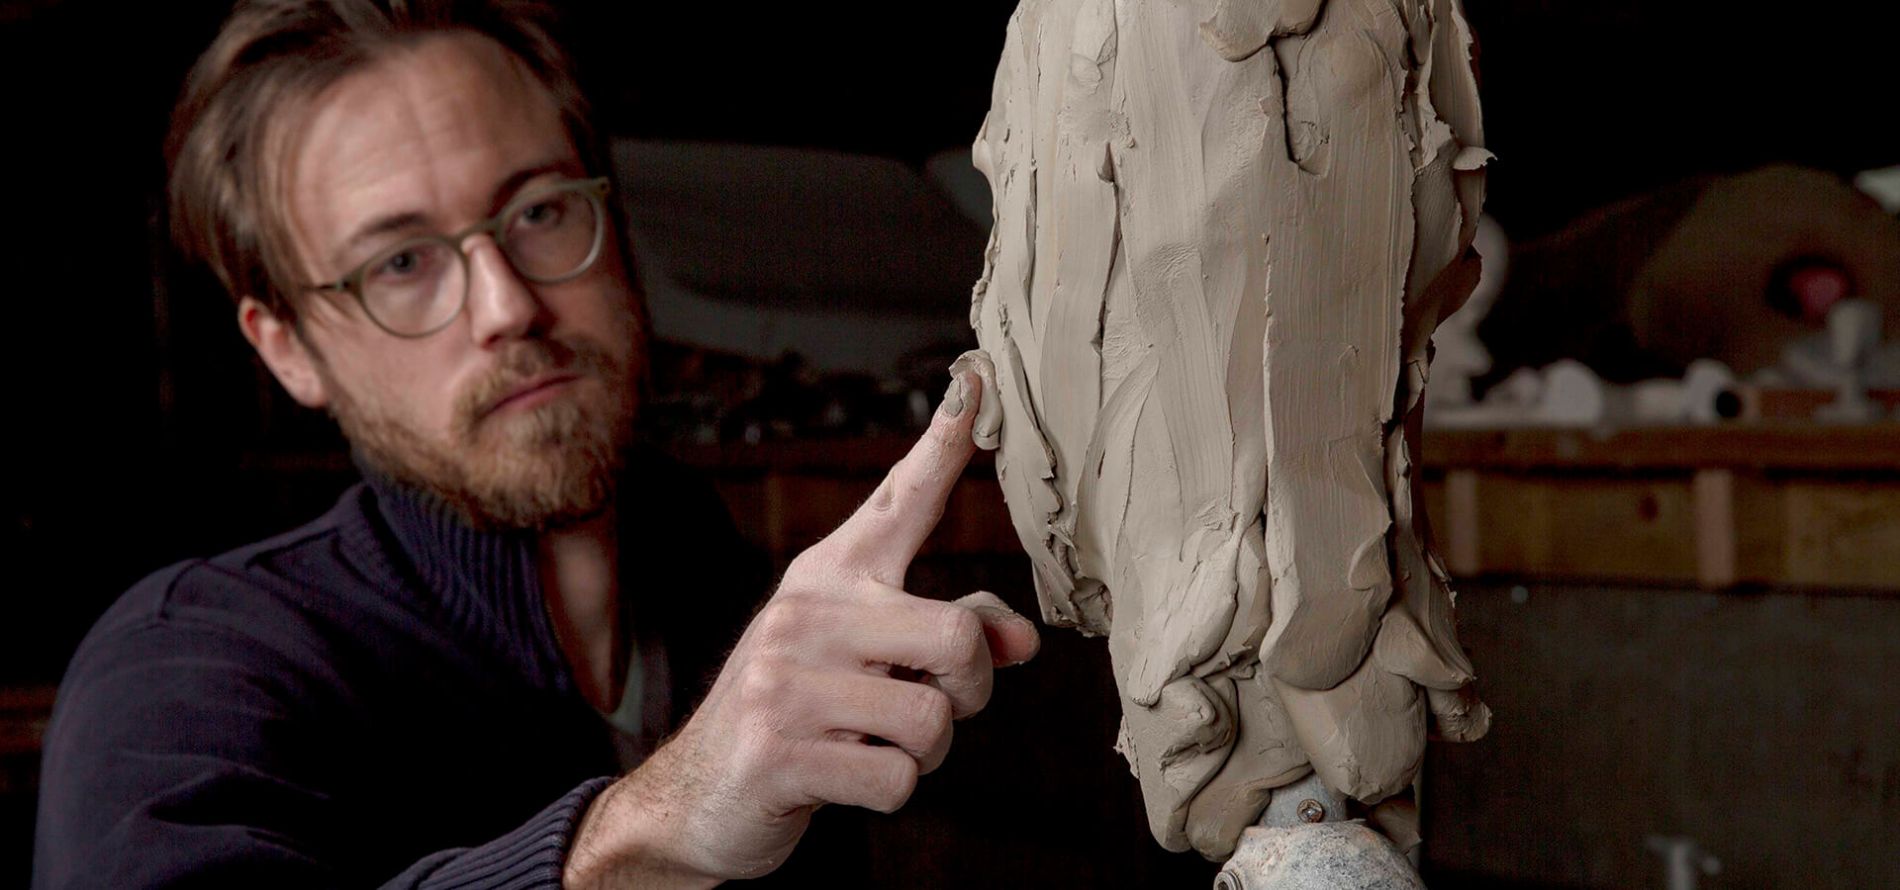
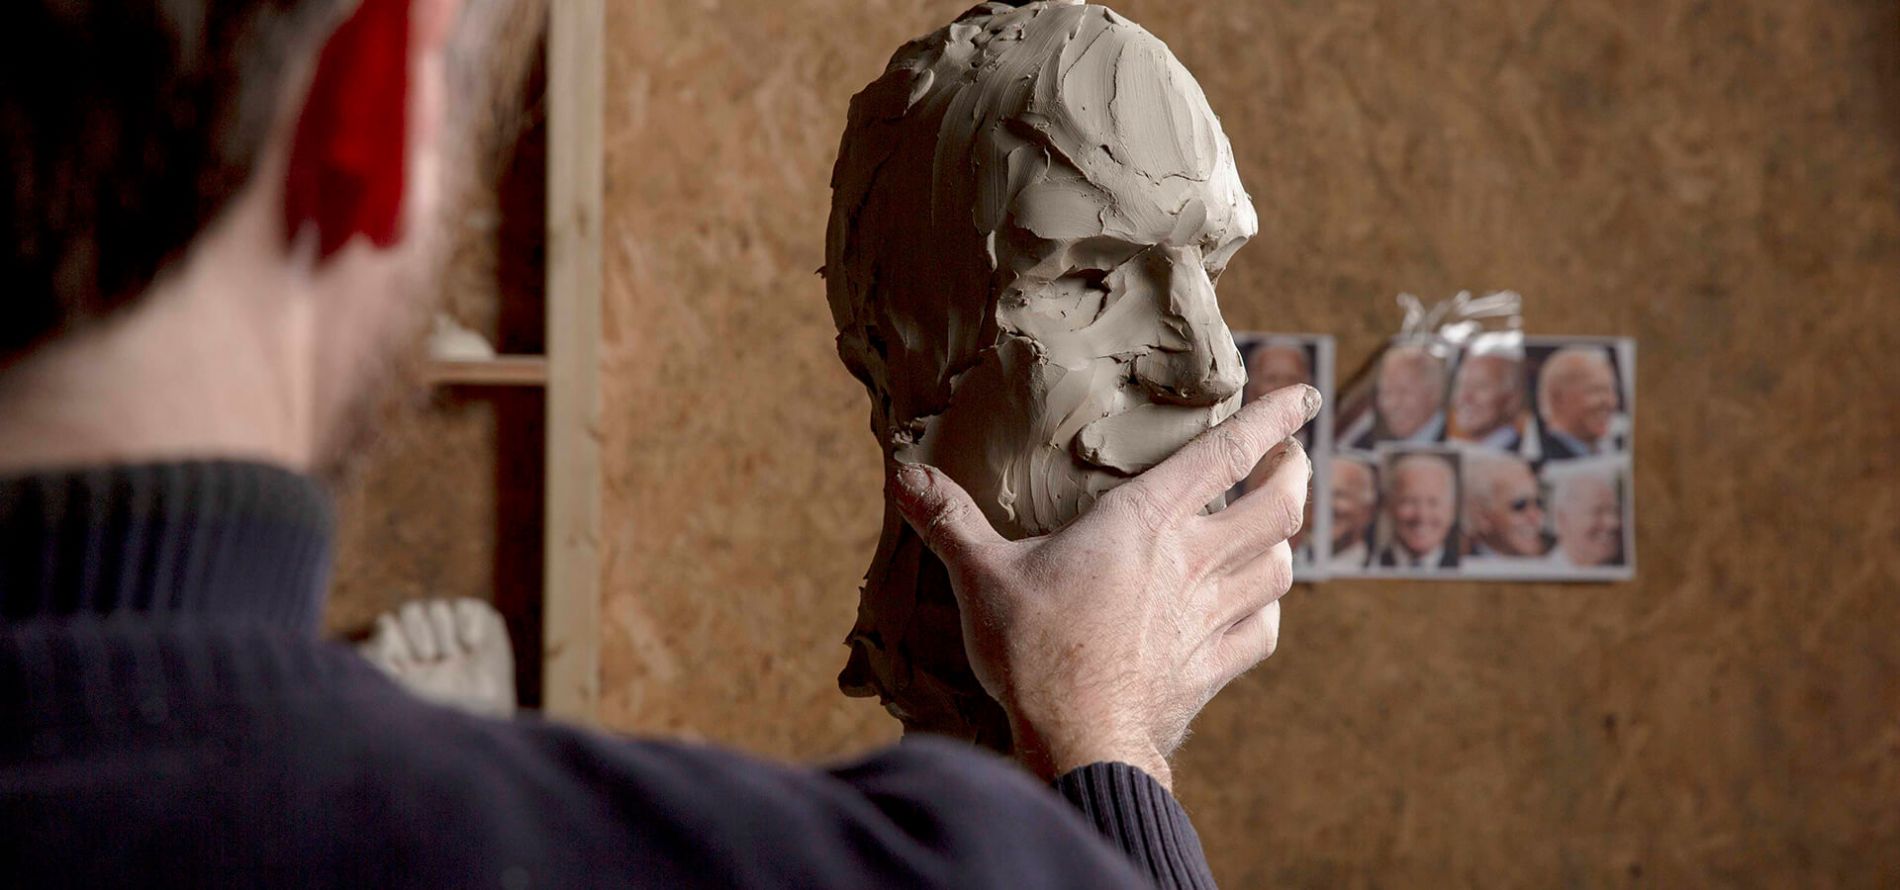
While the body casting team creates the fiberglass body, the lead sculptor is busy sculpting the head out of clay. Chunks of sculpting clay are mashed onto a metal armature that will serve as the support for the head as it takes shape. Once a block of clay is built up, the artist adds more clay by hand to achieve a rough shape of the head of the person being sculpted. At this point a more precise method is needed to achieve the realism required for the final sculpture. The artist then uses precise measurements, reference photos, calipers, and delicate wood tools to shape the face and add fine textures that bring the figure to life.
At this point it is time to fit the head to the fiberglass body. A metal support structure is created inside the chest cavity with a metal post extending upward into where the neck and head will be. The head is then placed on top of this post and more clay is added to the neck area to fill out the neck to the proper dimensions. Clay used to create the neck is pressed into the space where the neck meets the chest and shoulders. A temporary shirt collar is molded from clay and laid over the neck and shoulders to make sure the neck appears proportionate and will press naturally against a real fabric collar once the figure is clothed.
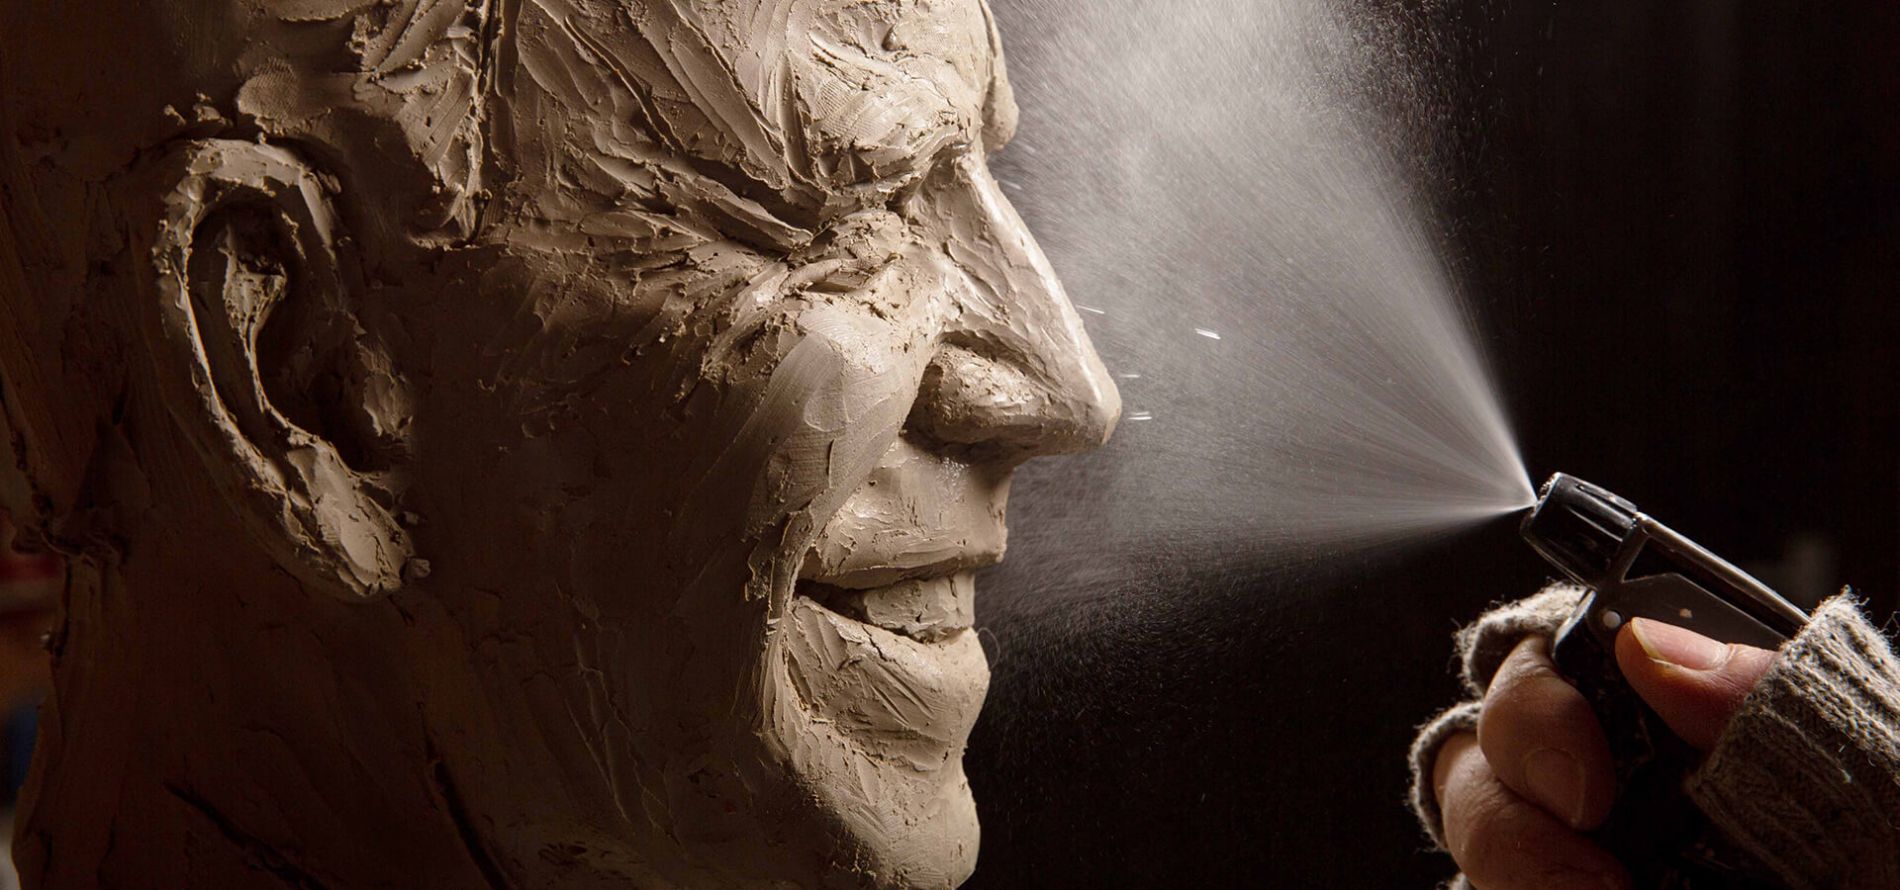
CASTING THE HEAD
When the clay head and neck are complete, a thin layer of liquefied silicone rubber is applied with a palate knife, capturing the minute wrinkles and subtle skin textures that give the final figure its lifelike quality. Once the silicone is dry, two more silicone layers of increasing thickness are applied to the head and neck and allowed to dry until the whole head is covered in a thick silicone skin. Liquid fiberglass resin is painted over the silicone and small sheets of glass fibers are embedded in the resin, one layer at a time until the fiberglass forms two halves of a hard shell, surrounding the head and neck.
The clay head is then removed from the silicone and fiberglass shell and the resulting mold is filled with a special mixture of beeswax and Japanese wax that has been carefully melted and colored to the approximate skin tone with oil paint. The molted wax is left to cool inside the mold for several hours until a thick wall of dried wax has formed inside the mold. The remaining molten wax in the middle of the mold is poured out and the head is removed from the mold and ready for eyes.
ADDING EYES AND HAIR
Using a curved, serrated wax knife, eye sockets are carved out from the inside of the wax head and realistic acrylic eyes are placed into the eye sockets and set in wax. At this point, the figure is ready for one of the most tedious and difficult steps in the wax sculpture process – the insertion of the hair. Long strands of real human hair are carefully tinted to the correct color and tone and then inserted one strand at a time into the wax scalp with a specialized needle tool. The final figure will require the insertion of over 50,000 individual strands of hair and requires about 4 weeks for this step alone.
COLORING THE FIGURE
Once the hair insertion is complete, it’s time to carefully paint the head and hands. The proper skin tone is built up by applying thin, watered down layers of oil paint. Additional layers of paint are then applied in increasingly finer resolution until even the tiniest freckle, mole, and blemish is recreated. This is the point at which the wax figure truly comes to life and the skin and face becomes almost undiscernible from that of a real human.
FINAL STEPS AND ASSEMBLY
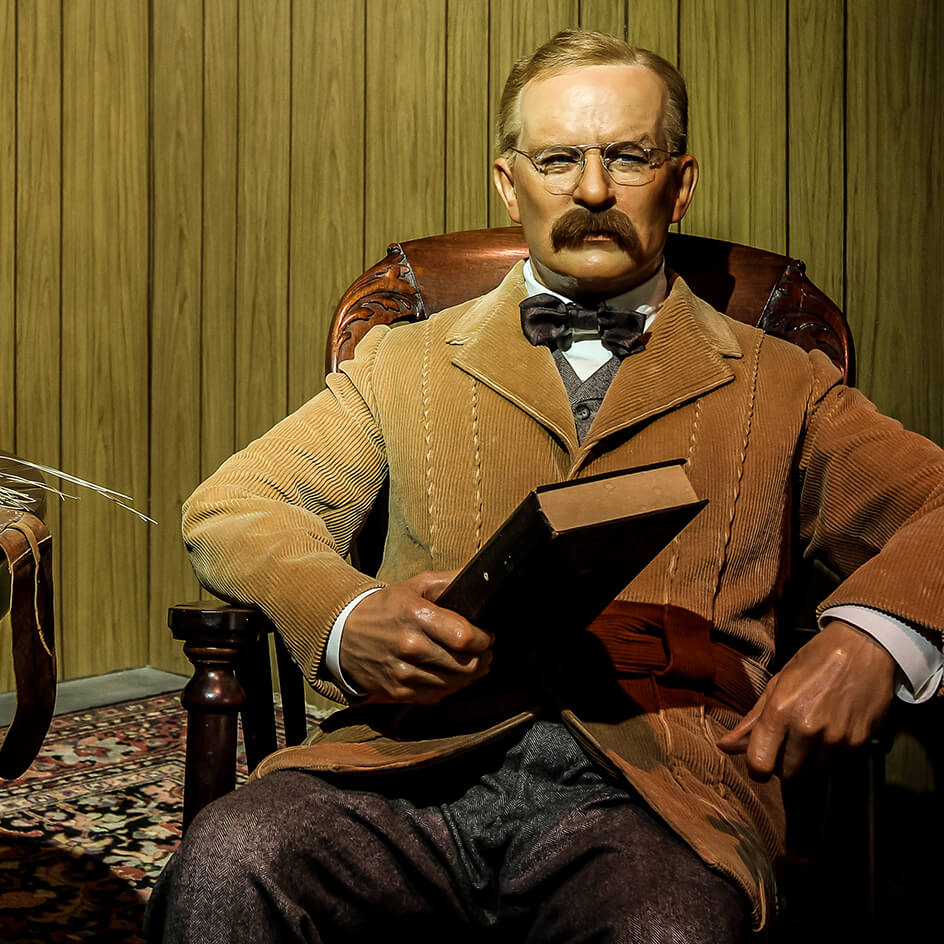
At this point, the figure’s long hair is cut and styled and the body, head and hands are assembled and dressed in the clothing the artist has carefully selected to recreate the style of the person portrayed. After four months, the figure is finally complete and ready to be exhibited.
Explore the Museum


Also Visit

Grapes & Grinds
At Grapes & Grinds, our passion is pretty clear. We’re in business to serve the wine drinkers and coffee connoisseurs of the Black Hills, and we’re pleased to have you join us.
Located in the heart of Keystone, we offer the perfect setting whether you're just starting your morning or unwinding after a full day in Hills. Stay in touch with your friends and family with our free Wi-Fi connection.